How to use Typescript and Webpack 4 with Reactjs
What is reactjs?
I would say Reactjs is the javascript library for building your web application. In reactjs it keeps things very simple by using views and their respective states to update webpages reactive way.
What is Webpack?
Modern day javascript evolution is limitless. Most developers use typescript build their web applications. But browsers only understand raw javascript. To fill this gap developers use webpack. Webpack compiles typescript into plain javascript and minify it for high performance.
What is Typescript?
Typescript is an enhanced version of javascript. Which provide developers to code like c# or java. Allowing them to use the power of ECMAScript features.
Let’s crate a simple react application using typescript and webpack bundler. Before beging developing you app you need to setup your environment. To do that you may need to install few components.
How to install Reactjs?
Open up a command window on your PC. Create a new folder called reactjs.
Before going any further, let’s check nodejs is installed in your PC. How to do that? type following command in the command window.
npm -v
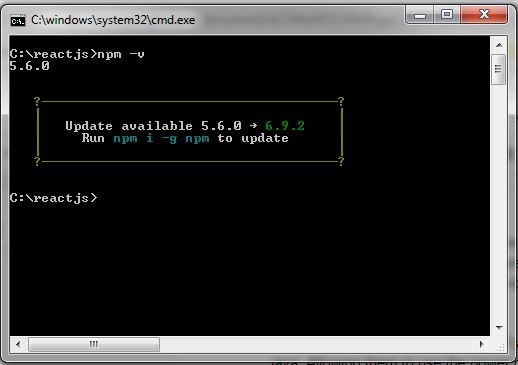
If your machine has nodejs will show the version number on the command screen. Otherwise need to download and install nodejs.
Let’s create a package.json file. Package json file will keep track of all the node packages that are being used in the project. To create a package.json file type following command in the command window;
npm init
Answer all the questions and say yes and it will create a basic package.json file.
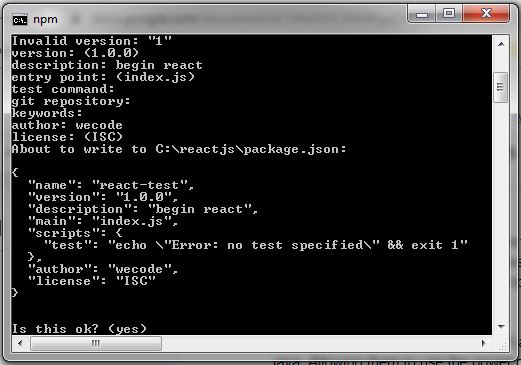
Your package json file will look as follows;
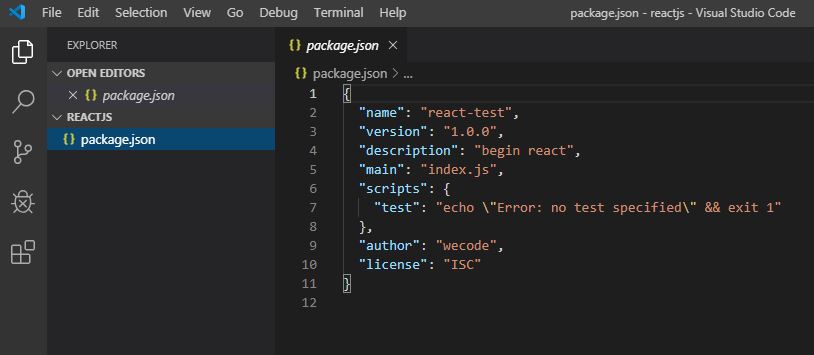
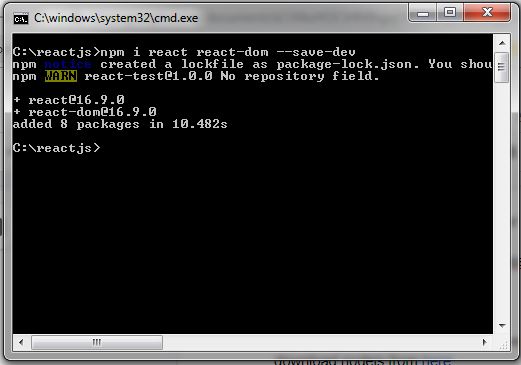
Now all set, let’s install reactjs packages; For this user the following nodejs command;
npm i react react-dom --save-dev
Above node command will install react core and react-dom packages at once. By specifying –save-dev will only install in the local folder.
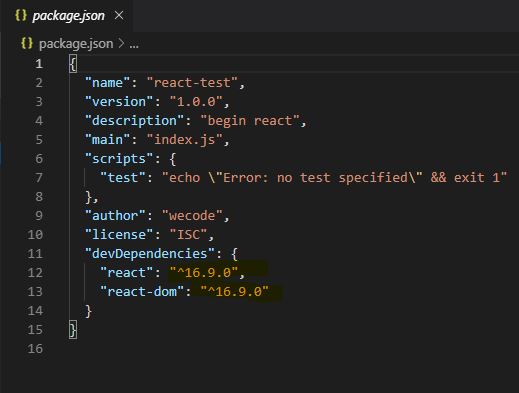
Now in your package.json file, you will notice 2 new entries for react and react-dom. As you can see every component you use will get an entry and maintain version number too.
You will also notice that there is a new folder called node_modules is present in your project. It is a very important folder. Npm will locate all the packages inside this folder and webpack will refer it from there.
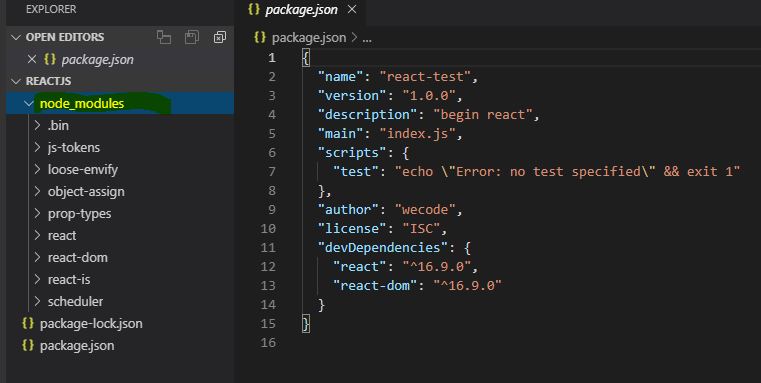
Now we have completed installing react and react-dom on the local folder.
How to install Webpack 4 ?
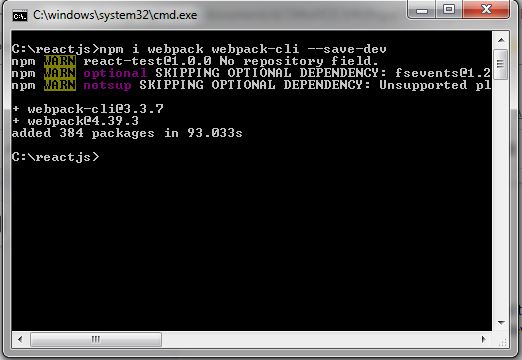
Use the same command window and type the following command;
npm i webpack webpack-cli --save-dev
Above command will download webpack core and webpack-cil packages into node_modules folder and will add 2 new entries into package.json file.
How to install Typescript and TS-Loader?
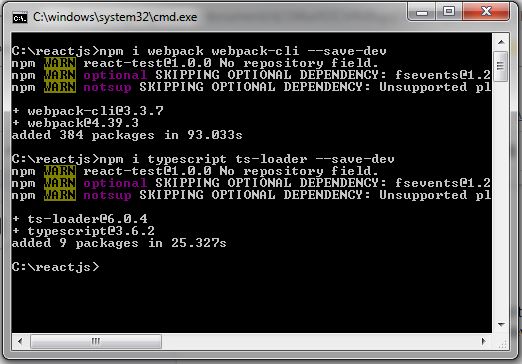
Let’s type following command in the command window;
npm i typescript ts-loader --save-dev
I’ll explain what is ts-loader? in detail later.
To use typescript in your project you need another configuration file called tsconfig.json. This file will contain setting to compile typescript.
How to create a tsconfig.json file?
It is simple. Go to your code editor in my case it is VSCode and create a new file called tsconfig.json Then visit the official typescript website and copy basic tsconfig structure.
 {
    "compilerOptions": {
        "moduleResolution": "node",
        "module": "commonjs",
        "noImplicitAny": false,
        "noEmitOnError": true,
        "removeComments": false,
        "sourceMap": true,
        "target": "es6",
        "jsx": "react"
    },
    "exclude": [
        "node_modules",
        "wwwroot"
    ]
}
Above tsconfig.json will be sufficient enough for this simple setup of react,webpack and typescript.
How to create a webpack.config.js?
In order to work with webpack on your project, it needs a webpack configuration file called webpack.config.js. It is a javascript file. This is the place where we tell webpack bundler, where to enter, how to compile our typescript code and where to locate outputs. Let’s create the webpack config.
 const path=require('path');

module.exports={
    mode:'development', //when you deploy can change it to production
    watch:true, //look for any code changes and compile them automatically
    devtool:"source-map", //will enable source maps for browser debuging
    entry:{ app:"./app/app.tsx"}, // entry point to the application
    output:{
        path:path.join(__dirname,"./dist"), //compiled js code folder
        filename:"[name].js" //bundle name
    },
    resolve:{
        extensions:[".js",".json",".jsx",".tsx"] //compatible file extensions list
    },
    module:{
        rules:[ //rules for ts-loader
            {
                test:/\.tsx?$/,
                exclude: /node_modules/,
                use: [
                    {
                      loader: 'ts-loader',
                    },
                  ]
            }
        ]
    }
}
Since we use nodejs and package.json to build webpack needs to change the scripts section of package.json as follows;
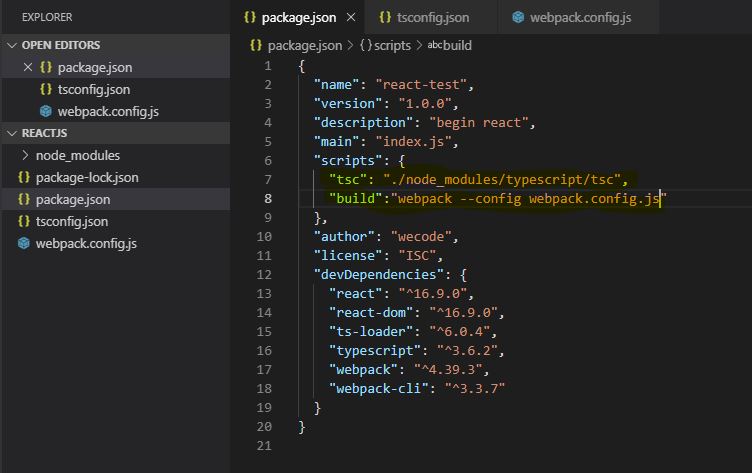
As you can see in the first section I’ve added typescript builder settings.
"tsc": "./node_modules/typescript/tsc",
Above command tell the node builder to pick up the typescript version installed in the local folder. This way even though you have installed an older version on your machine globally, it will use the latest version from your local.
"build": "webpack --config webpack.config.js"
With this command we are telling nodejs builder to start using webpack bundler.
Now everything is ready to start building first react app. Let’s create a folder called app and add a file called app.tsx into it.
import * as  React from 'react'; //import react core
import * as Reactdom from 'react-dom'; // import react-dom
//render first react component into a div into your webpage
Reactdom.render(<div>Hello ReactJs</div>,document.getElementById("app"));
First import is the react core library. It contains all the react core features like component,hooks,fragments etc.
Second import is react-dom and contains all the utilities for DOM manipulations. Third line uses react dom to render a react component into a div in webpage. So far what you have done is creating a react app and bundling it. Let’s what you have created and see how it is in action. To do that you need to create a html file and add a div with an id app into it. Then at the bottom you need to add a reference to the bundle.
Now we compile our first react component using Webpack 4 and Typescript. How you can do it? type the following node command on the prompt.
npm run build
Now this is a special npm command. What the run command will do? it search through the package.json file script section and find the command line called build and start executing it.
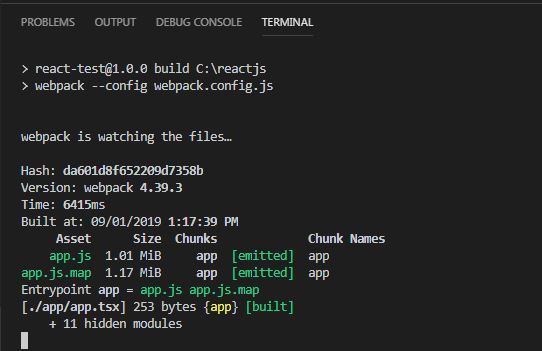
Once it being successfull, you will notice that there is another new folder called dist is getting created. There you can find the final bundle which you can use it as a reference to display your app in the browser.
How to display your react app on the browser?
Add the following html page into your folder.
 <!doctype html>
<html lang="en">
  <head>
    <title>Hello, React!</title>
  </head>
  <body>
    <!--where the app will going to hook-->
    <div id="app"></div>
    <script src="dist/app.js"></script>
  </body>
</html>
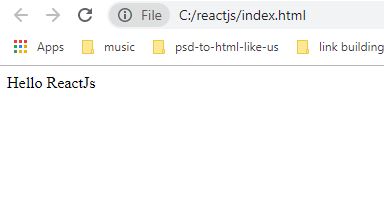
As you can see on the page I’ve added a div with id app and the script from the dist folder. When the script executed on the browser it will look for this div and append the react app into it. Now open your webpace you will see a message.
You can download full source code from github

Share your thoughts