How to setup ASP.NET MVC Reactjs, Typescript, webpack
In this article guide you step by step how to setup Reactjs, Typescript, Webpack bundler with ASP.NET MVC project. Firstly let’s begin with creating a new ASP.NET MVC empty web application. You can follow the steps below.
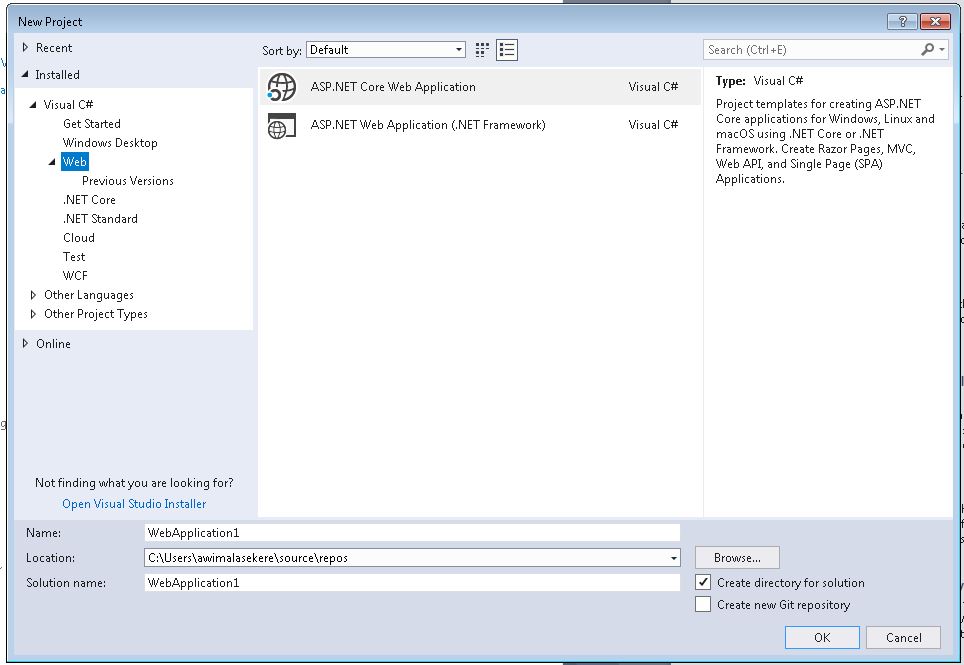
Step1 . Open your visual studio and select create new project option. As a result, it will open up following dialog.
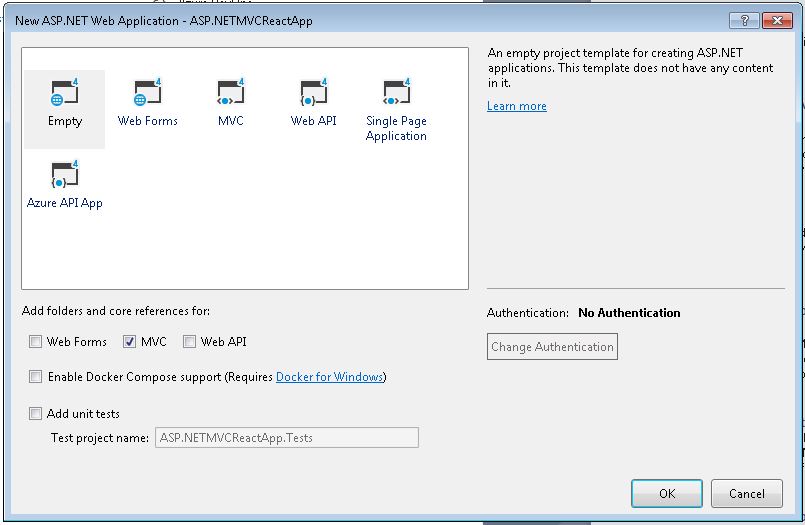
Select ASP.NET Web Application and give it a project name (ASP.NETMVCReactApp). Locate where you want to save the project and click Ok. As a result, will take you to the following screen.
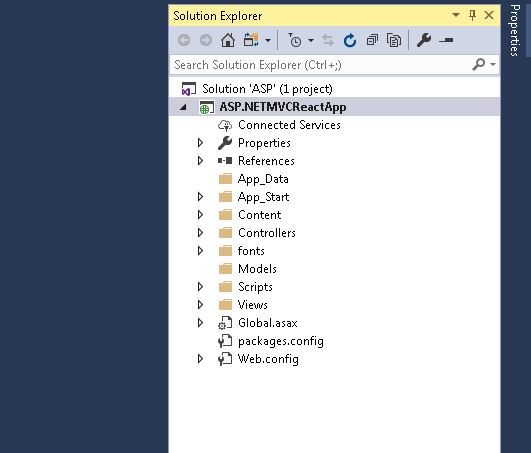
Form this screen select the empty project option and check the MVC option and click OK. You will arrive at the following screen.
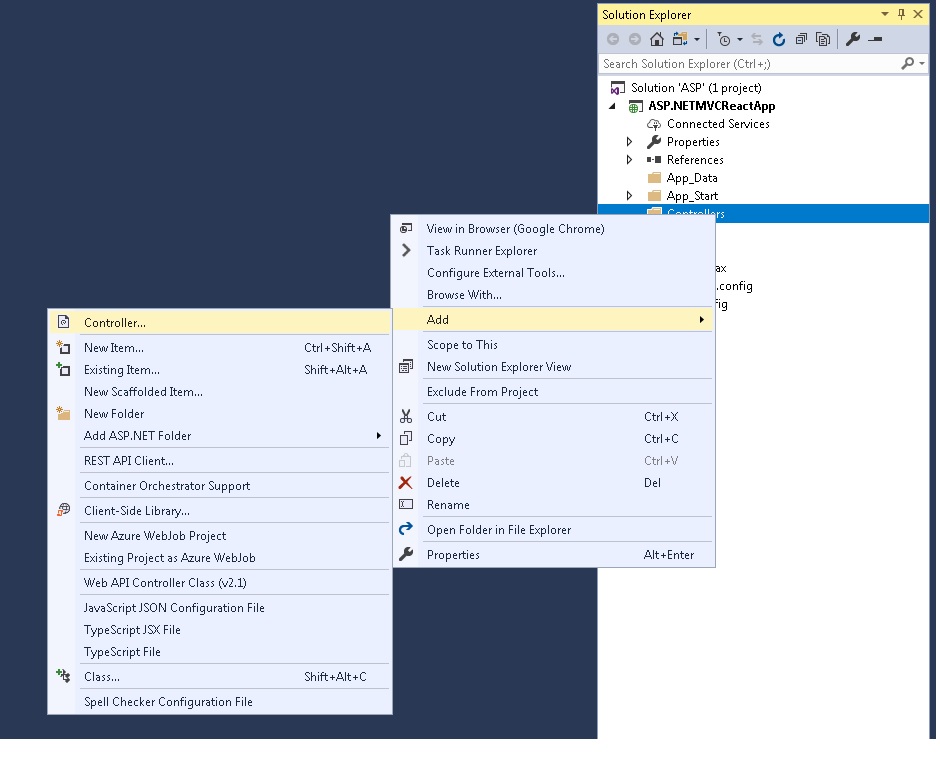
Since ASP.NET MVC apps use Model, View and Controller archtechture, first we need to create a controller. Right click on the controller folder and click on the add controller option from the context menu as shown in the below image; It willallow you to create a controller
In the next screen you can select empty ASP.NET MVC 5 Controller option as shown in the below image;

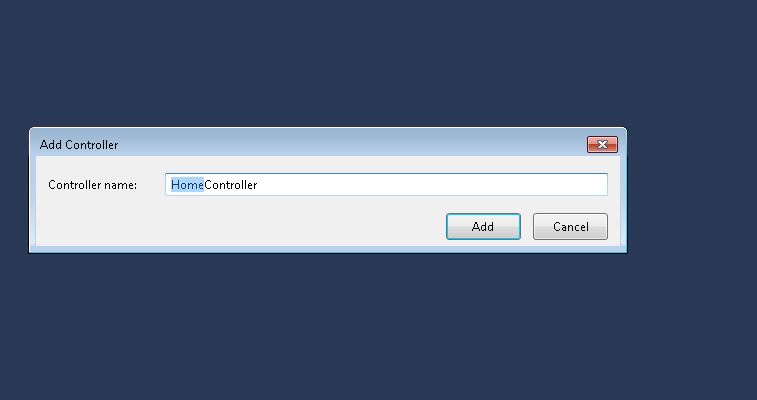
Once you click add on this screen, it will take you to a controller naming screen as follows;
Let’s name the controller as HomeController. Click the add button again. It will take you to following screen;
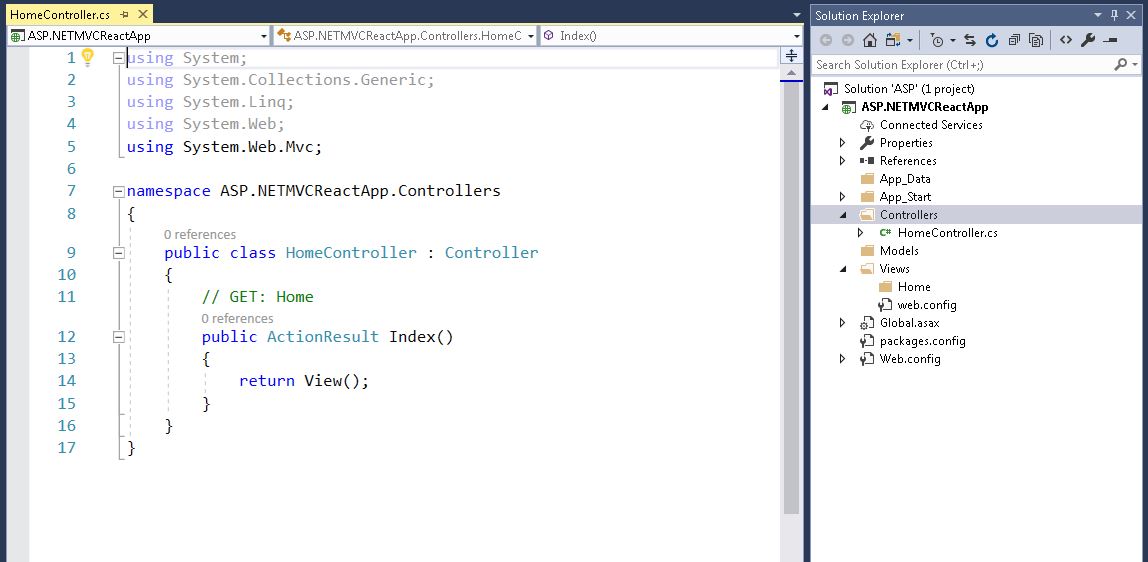
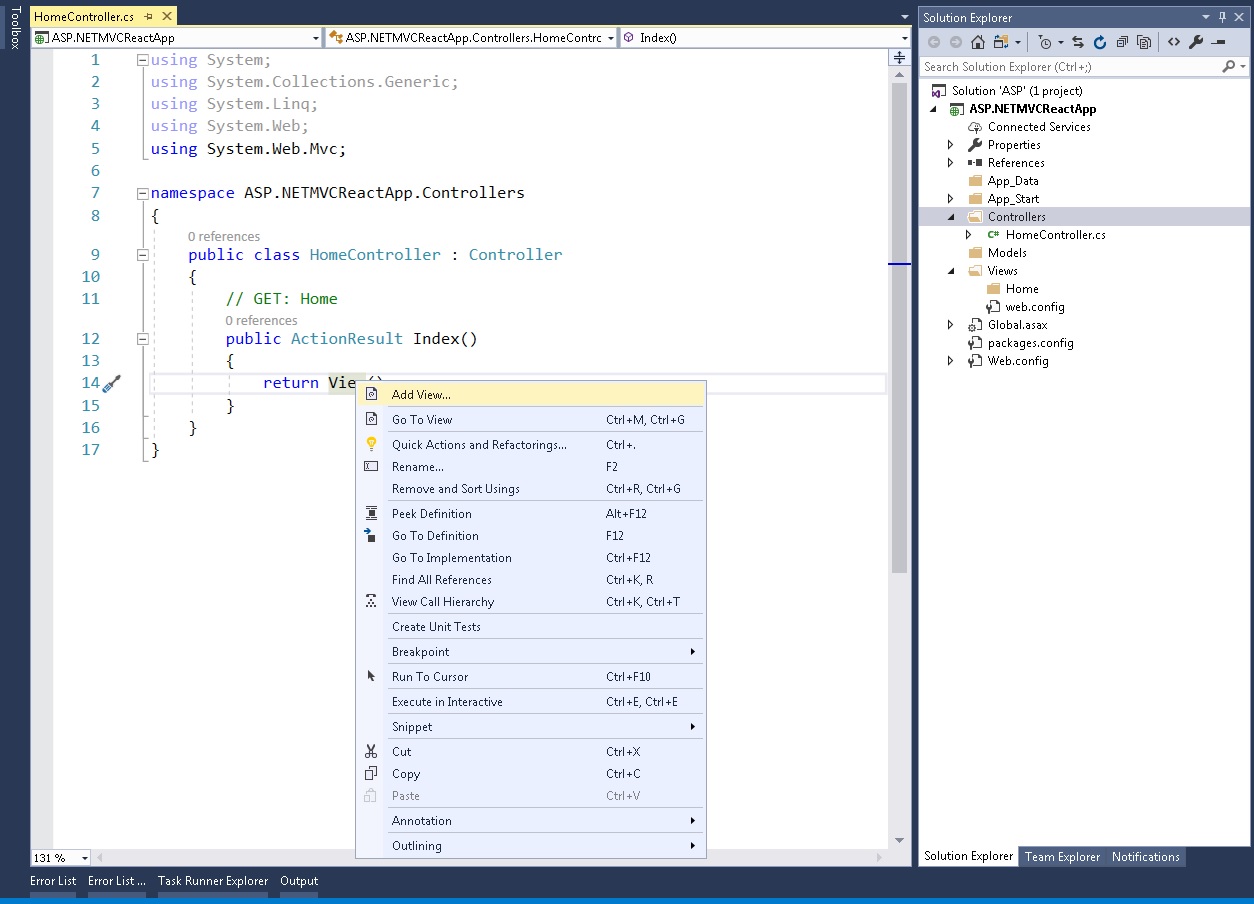
In addition, above screen shows Visual studio auto generated Home controller code. Not only that but it also will add a new folder in the views folder called Home. Next step is to add a razor view. You can add a razor view by right clicking on the action method return View() function. Following image will explain it bit more in detail.
Click Add View option, it will take you to following screen where you can configure your home view details.
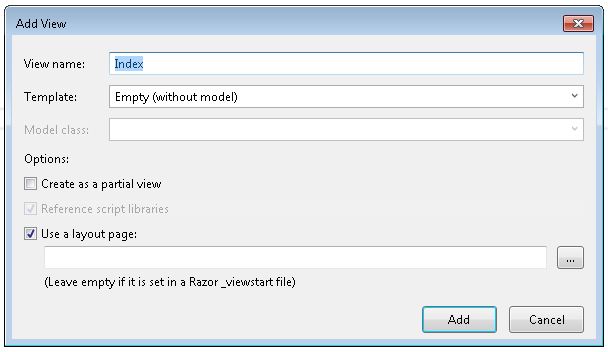
For this project nothing need to change here, just click Add it will add a new razor view as follows;
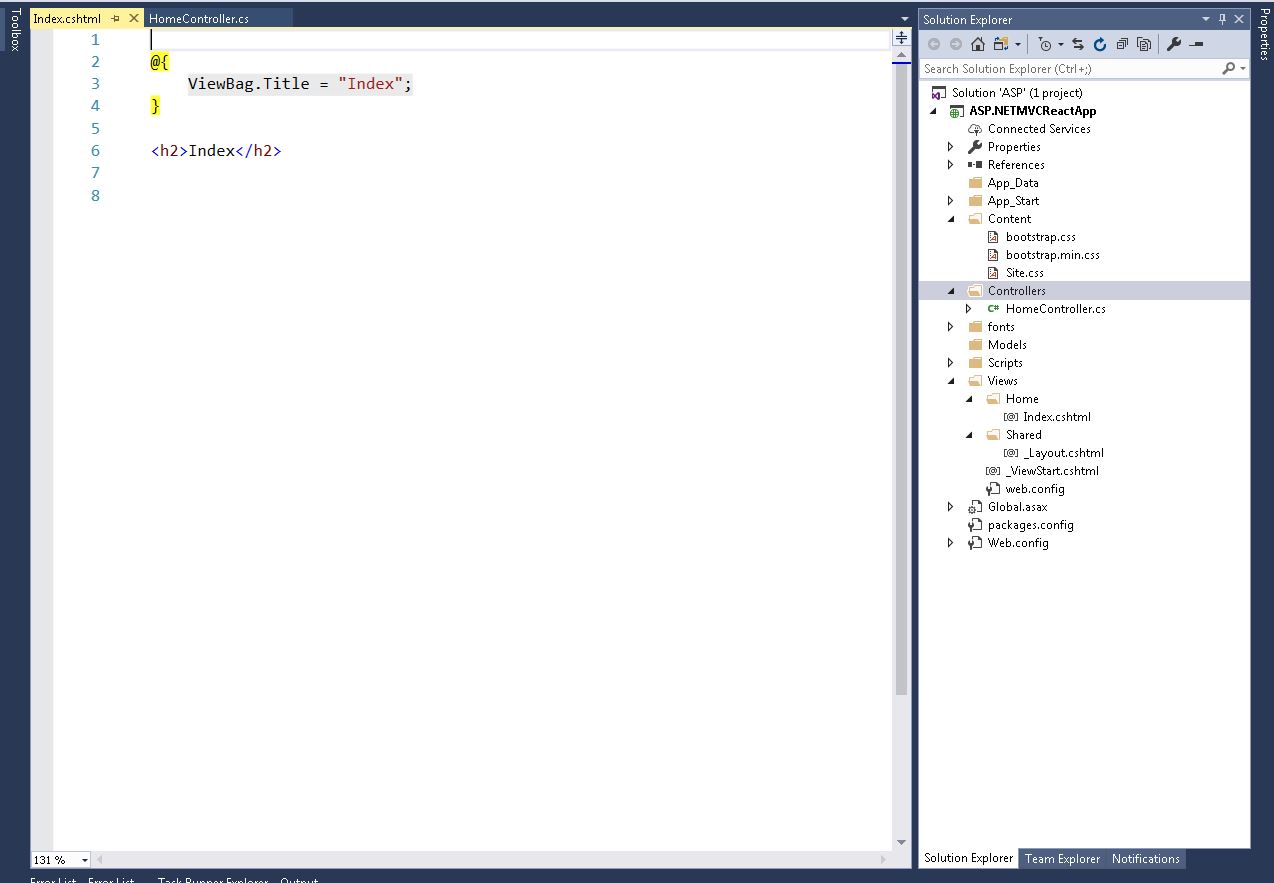
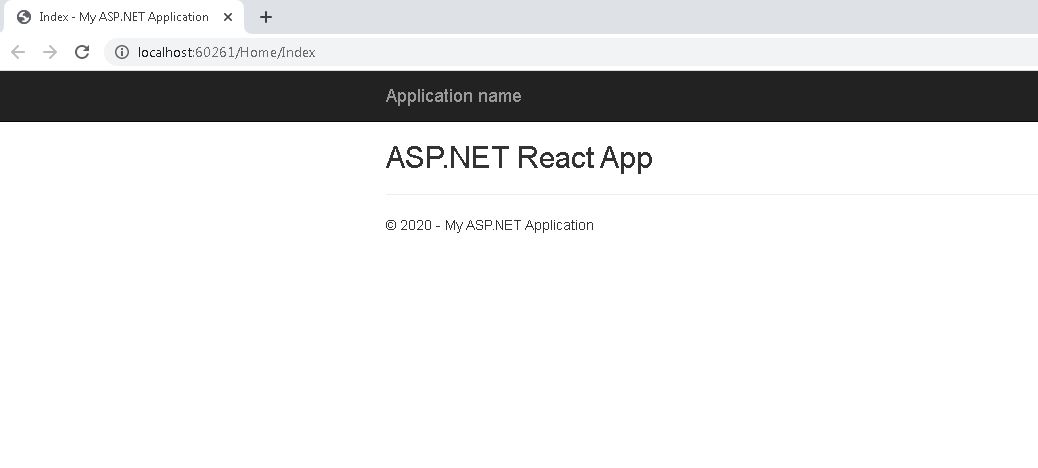
Now you can change the H2 title to ASP.NET React App hit save. Next step compile and run the basic ASP.NET MVC web application. You will see the following screen on your browser.
Now ASP.NET MVC application is ready for react and webpack integration.
How to install and setup reactjs?
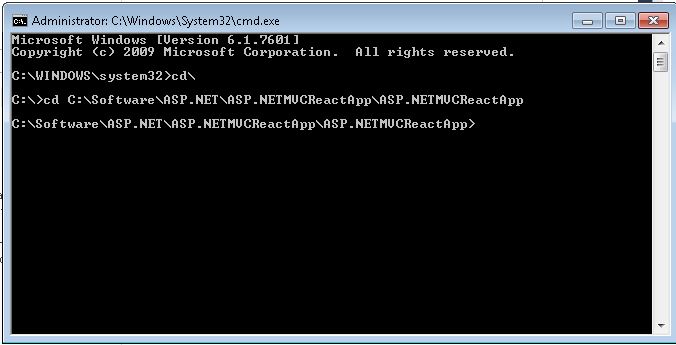
Step 1 To run a basic reactjs app you need react and react-dom npm packages. To install them you can use NPM package manager or any other. There are several ways to do it, for the time being I will be using the windows command prompt. So you can locate your project folder in the command prompt as follows;
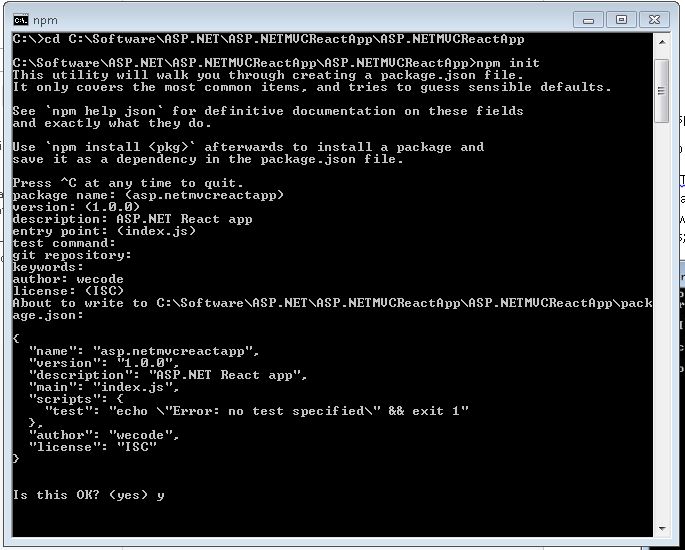
Before we begin installing react npm packages, we need to create a package.json file. Package.json file keep track of all the package references required to run the react application. So we need a one too. Lets create a package json file using following NPM command.
npm init -yYou will be prompt set of questions once you answer them it will ask you create y/n say Y and enter. It will create a new package.json file in your ASP.NET application root folder. Please not this file should be always on the root.
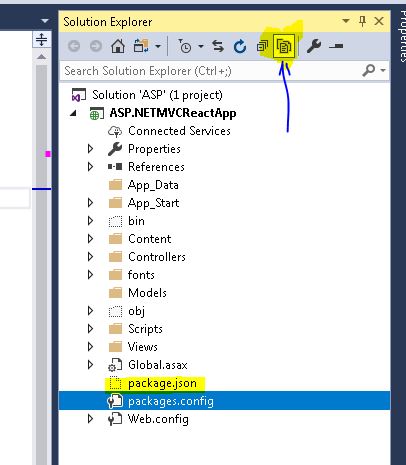
Now you can go back to ASP.NET MVC solution and include the package.json file as shown in the image. Right click and include it.
Lets go back to command prompt and install react and react-dom using following command.
npm I –save-dev react react-domI – stands for install
–save-dev – stands for dev dependency.
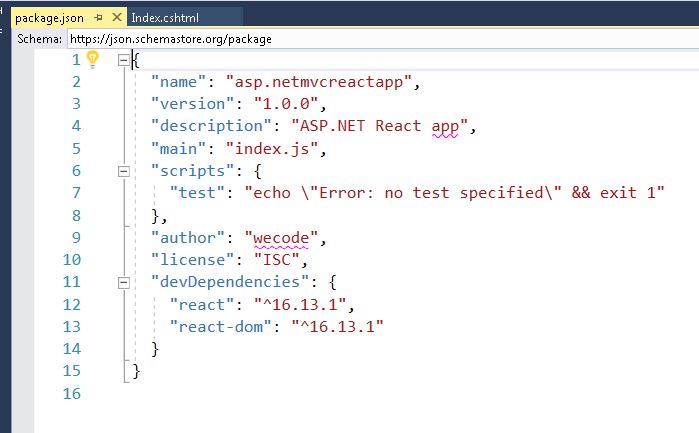
Once installation complete you will notice 2 things. First thing you will see, two new reactjs package references are being added to package.json file.
Second change you will notice is the new node_modules folder. This folder will be the npm package repository. All the js packages you installed will be located here. Node_modules folder always should be excluded from the ASP.NET project.
How to setup Typescript and it’s transpiler with webpack?
Modern day javascript development is all about writing code using Typescript. Apparently Typescript it is a supper set of javascript. On the other hand browsers does not compatible with typescript. Hence we need to use a transpiler convert typescript into raw javascript. Therefore we’ll be using ts-loader to transpile typescript into raw js. Lets install ts-loader using following npm command;
npm I –save-dev ts-loaderAs we are going to use typescript for writing js code, lets install typescript.
npm I –save-dev typescriptLets add all the configurations required run react, typescript and webpack in a ASP.NET MVC app.
How to configure webpack with ASP.NET MVC?
When you are working on a Reactjs UI front end project, ultimately you need to bundle all the js code into one file and minify and compress it for better performance over the web. There are many tools to do that. Webpack, Rollup, parcel are some of them. In this project I will show you how to use webpack. Lets install webpack into your local folder.
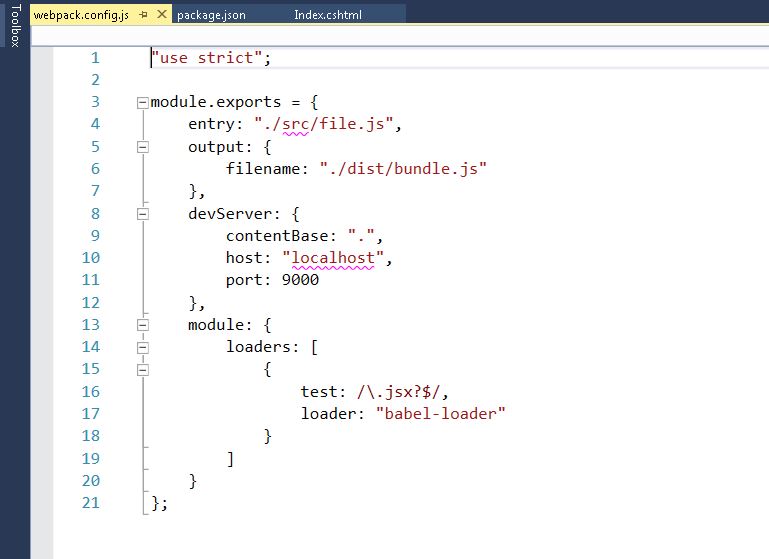
npm i –save-dev webpack webpack-cliIn order to run webpack with ASP.NET MVC we need to setup few config files. First we need to add a webpack.config.js. You can add it by right clicking on the ASP.NET MVC project and select add new item from the context menu and select the following option as shown in the image;

If you don’t see webpack configuration file option in your ASP.NET MVC project, add new item screen, you may need to install webpack task runner visual studio extension. Select webpack configuration file and click add. It will add a new webpack.config.js file as follows;
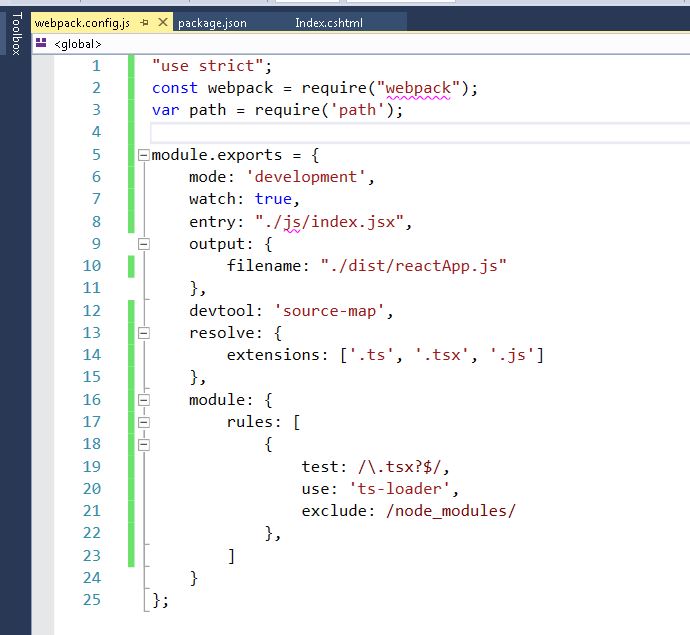
In the above webpack configuration file you needs to be change following;
- Please specify the entry point. So for this ASP.NET MVC project we need to create a folder called js and create a typescript file called index.tsx. Now change the entry point as “./js/index.tsx”
- Please change the output file name as “./dist/react.app”.
- You can remove the devserver section and add source map settings devtool: ‘source-map’. This setting will keep track of source maps while bundling js files. It will help you to debug your code with devTools of your browser.
- You need to configure webpack build mode. There are two modes, one is called development and the other is production. Lets begin setting it to dev mode: ‘development’,
- Lets add the webpack watch setting. This is very important feature, which will keep track of all the changes you made to js file and bundle them automatically. (watch: true)
- Lets configure loaders. Since we are using typescript in our project, we did install the ts-loader lets add ts-loader settings as follows;
module: {
        rules: [
            {
                test: /\.tsx?$/,
                use: 'ts-loader',
                exclude: /node_modules/
            },
        ]
}- Lets configure what files webpack should resolve by adding the following;
resolve: { extensions: ['.ts', '.tsx', '.js'] },Once you complete webpack configuration your webpack.config.js file would look as follows;
How to configure Typescript
Since we use TypeScript for javascript coding, we need to add a tsconfig.josn file in to our ASP.NET MVC solution. You can add it by right clicking the solution and add a json file and configure it as follows;

Configure package.json
Next setting what you need configure is package.json script section. You can add the following configure into package.json file;
"scripts": {
    "tsc": "./node_modules/typescript/bin/tsc",
    "start": "webpack --config webpack.config.js"
  },
Moreover with this configuration setting allows you compile your code using nodejs or webpack task runner. Subsequently the start command will build typescript first and then use the webpack config file we created above to bundle it; Now you can even use npm commands to compile you typescript code, but we are going to use visual studio task runner to compile js code.
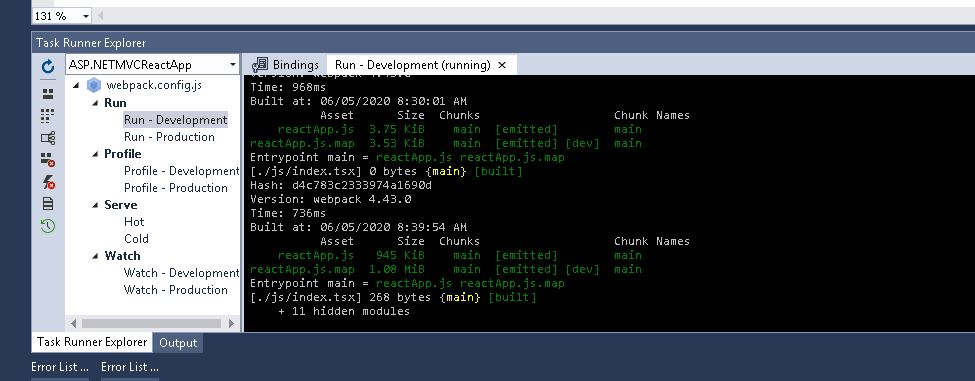
When you install webpack task runner extension, it will provide a new task to run and watch webpack through visual studio. Also, let me show you how run the webpack task runner.
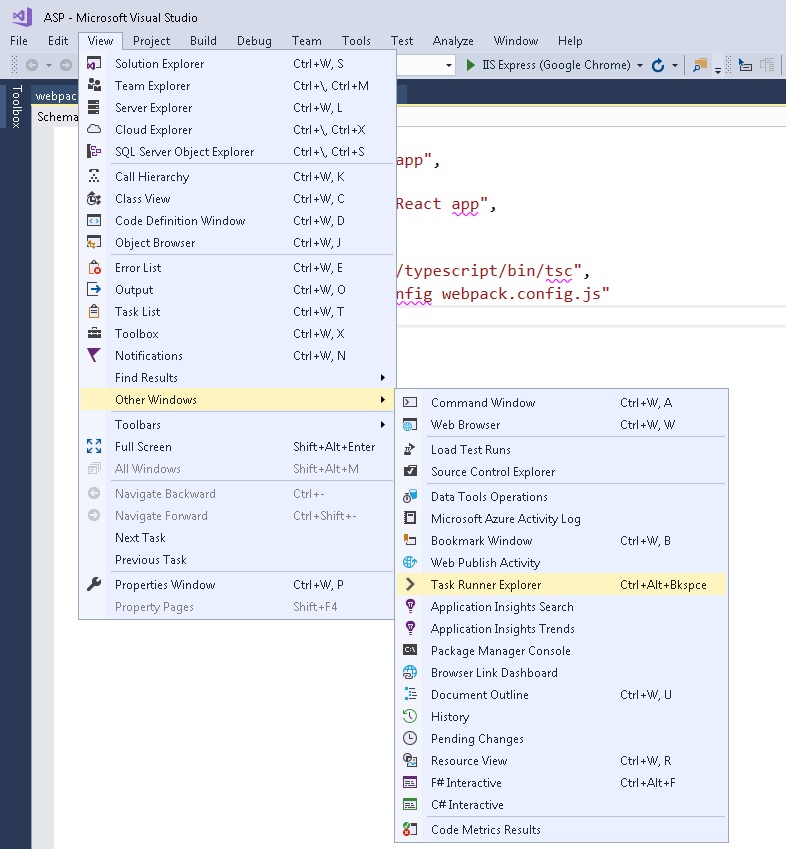
Once you select task runner explorer, you will get the following screen.
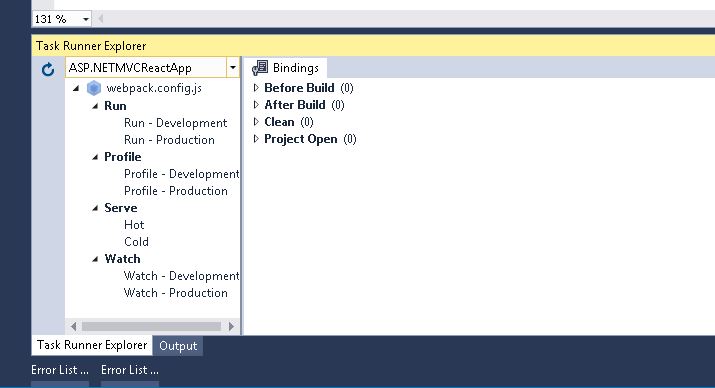
Besides from the above screen we need to select first run option “Run – development” and double click on it. Then you will notice webpack build task is running and the results of it and it is watching for changes. If all settings are correctly setup you will get following output;
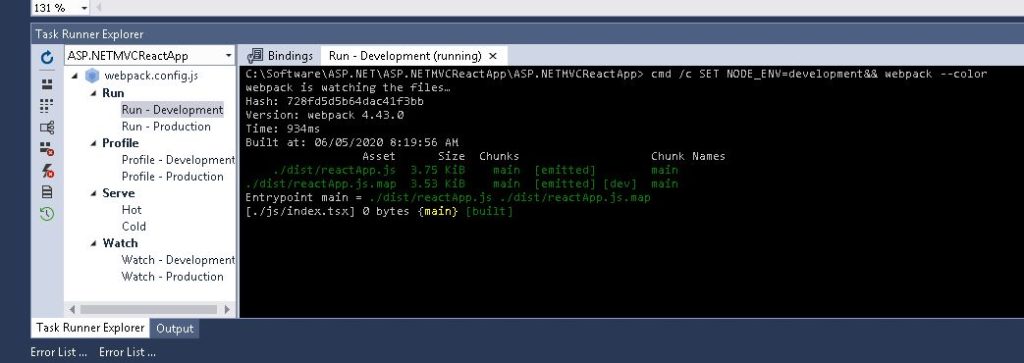
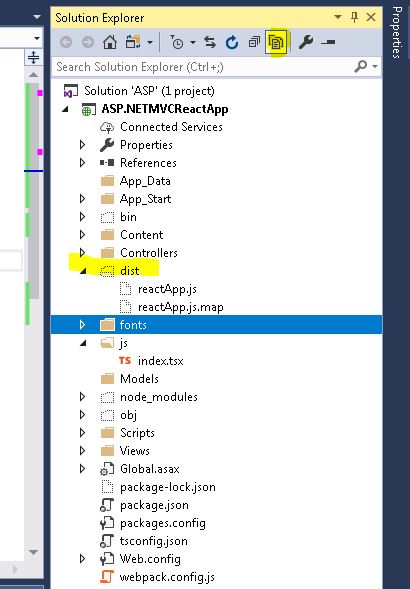
After running the webpack task, Also you will notice there is a new folder has been added to in the ASP.NET MVC solution space called dist. Subsequently, this dist folder contains the compressed js output file that we refer through ASP.NET views.
At this time we can add a simple reactjs app and say hello to everyone as follows. For this purpose you can use the index.tsx file. Add the following react code into index.tsx file.
import * as React from 'react';
import * as ReactDom from 'react-dom';

ReactDom.render(<h1>Hello React World...........!</h1>, document.getElementById("app"));
Once you add this and save the file, you will notice that your changes are being compiled and bundled into reacApp.js.
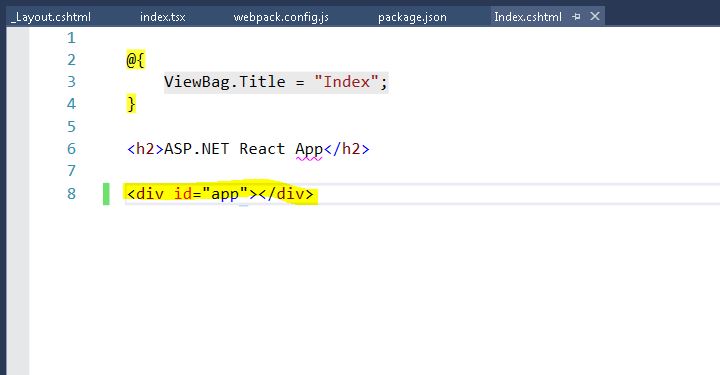
Furthermore, our react app require a div tag with an id called app to render its content. So lets add a div tag into views->home->index.cshtml file.
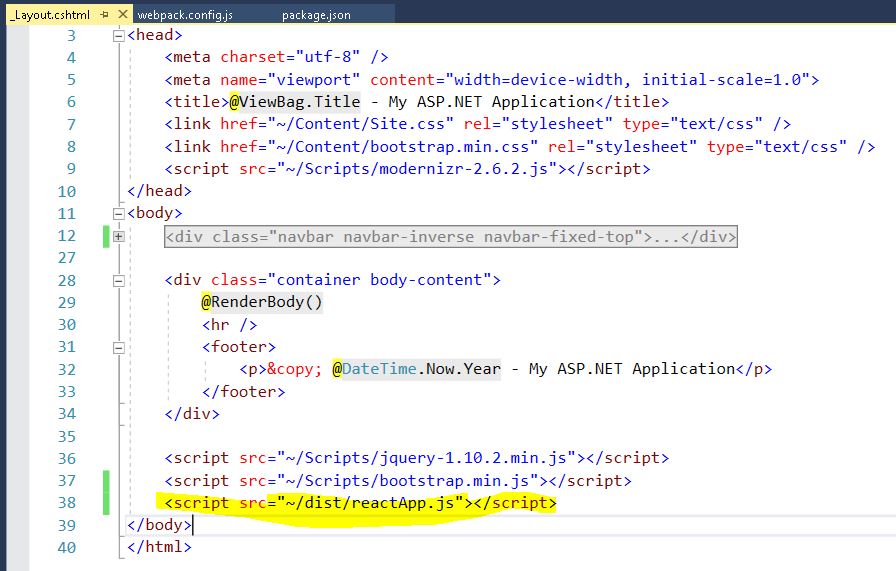
At this time need to add the js reference into asp.net razor view master layout. In ASP.Net all the view references are being setup in the layout master as shown below;
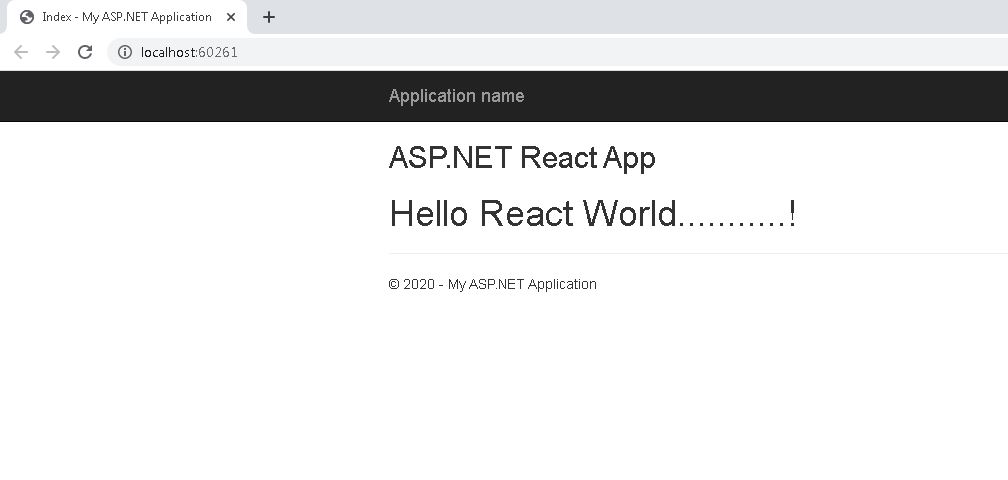
Now save all your files and run ASP.NET MVC app. You will get to see the following react app screen is up and running with ASP.NET MVC project.
You don’t always need ASP.NET to run reacjs application. You can run them in different ways. For example How to use Typescript and Webpack 4 with Reactjs is another way of running react apps.
In conclusion I hope this article help you to keep the first step in ASP.NET MVC Reactjs world.
You can download the full source code from github
Share your thoughts